
Braising is a long cook time, low temperature cooking technique, a concept similar to those who are fans of sous vide. However, there are a few differences between the two, and each have their own purpose in the kitchen. But, we have included some tips so that you can combine the two techniques at home!

What is braising?
Braising is a style of cooking that combines both wet and dry heat.1 Dry heat comes from the initial, high heat cooking, while the wet heat is where the magic happens. Meat (usually tougher cuts) is browned in fat over high heat to develop a rich, flavorful crust, then cooked for an extended time over low heat in a covered container, with a small amount of liquid (like stock, juice, or wine), aromatics and seasonings, and often times vegetables. The long, low cook time helps to break down the collagen and connective tissues in the meat, leaving it tender and shreddy. Does this sound like a stew? Sort of. The main difference between braising and stewing is the amount of liquid that is added; stews usually contain larger amounts of liquid, while braising requires less, and is not added until after the meat has been browned.
The history of braising is a little cloudy. Traditionally, cast iron pots were used over fire to cook meals. The heat from the fire and the steam from inside the pot helped to develop deep, rich flavors, while tenderizing the meat and vegetables. Today, this is a method most commonly started on the stove and finished in the oven, and is great when the weather is cold and you need something hearty.
Tips for perfect braising:
- Make sure the pot that is being used is heavy and has a tight fitting lid. Often times a Dutch Oven is the perfect kitchen tool for braising. They are heavy and made of cast iron, which helps to regulate heat and insulates well.
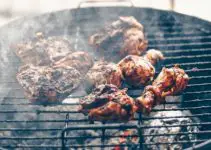
- Season and sear your meat well! This is super important. Seasoning the meat at the beginning helps to set the base flavor layer for the dish. Searing the meat (cooking it over high heat) triggers the initial Maillard reaction and also helps to develop flavors.
- Deglaze the pot! After the meat is browned, before the long cooking starts, add alcohol or liquid to remove the delicious brown bits stuck to the bottom of the pot; again, tiny flavor bombs.
- Braising is not stewing; if there is too much liquid in the pot, it will steam and boil instead of braise; there will be plenty of liquid released from the meat during cooking, so don’t fret. If there is too much liquid in the pot prior to adding the meat back in, continue to cook it until it reduces down to a thick, rich stock (even erring on the side of becoming a paste).
- Secrets for a flavorful braise? Aromatics! What does that mean? Vegetables (think any veg you would normally add to a roast or a stew; carrots, celery, fennel, onion, garlic), herbs (pepper, sage, thyme, rosemary, any really earthy herbs that can stand up to the richness of the dish), and even acidic components like soy, citrus, vinegar, or tomato ensure that the dish is going to awesome. These flavor components help to develop layers and prevent a bland sauce.
Can you combine braising and sous vide?
Yes! Sous vide is a great hands-off technique that renders the most tender, perfectly cooked meat (if you’re looking for a new sous vide machine, check out this article to find your perfect circulator). However, flavors don’t develop during the cooking process like they do in a braise; so, how to produce a tender, perfectly cooked piece of meat but with flavors of a braise? Combine the two!
- Set up your sous vide like normal so that it’s ready to go. Make sure there is enough room for plenty of water to submerge everything that will be cooked.
- Prep your meat; cut it into smaller pieces, season, and brown over high heat in a heavy pan until a nice brown crust develops. Remove to a plate.
- Add vegetables and seasonings back to the same pot, making sure to add a little liquid to help deglaze and pick up the delicious little brown bits at the bottom. Reduce everything down until its thick and rich. Feel free to play with aromatics, seasonings, and acids (like tomato or vinegar).
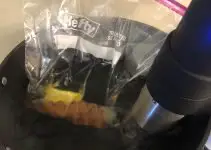
- Add the vegetables and the meat to sous vide bags; don’t overcrowd, using more than one bag is OK here.
- Submerge the sealed bags, set your timer, and let your sous vide do the work!
- Once everything is done, you can transfer it all to a large serving bowl and garnish with some fresh herbs or citrus zest.
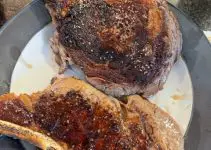
These two cooking techniques can be combined to make an awesome, flavorful, tender meat. Just know that it will likely take longer than a traditional braise (one recipe for braised sous vide short ribs called for a 24-hour cook time). But, with a little prep work on the front end, sous vide is a great way to make a delicious meal without having to use the oven or other traditional cooking methods. It can even be done while you are at work! No need to worry about leaving the oven on while you’re away.
Contributor:
This article was written by Stephanie Searor, MS RD LDN
References:

